Showing posts with label Games. Show all posts

Citrus Engine + Dragon Bones: The Cyborg


As you know that Citrus Engine and Starling seems to be officially support Dragon Bones as their main skeletal animation library. It’s Dragon Bones that have their sub-forum on Starling forum, not other skeletal animation tools/libs like Brashmonkey Spriter and Esoteric Spine.

Dragon Bones Citrus Engine

But, even though Dragon Bones have their own place at the community, it still goddamn hard to find a good & complete tutorial how to get the best of that tool. What you get is a very basic getting started tutorial, also some complicated example files.  So you’ll also need to read the documentation and searching on the forum.
And most of them are for Starling, not Citrus Engine specific. Well, actually, everything that work on Starling will also work on CE.

I can only found one good CE + Dragon Bones tutorials, here at PseudoSamurai. If it’s your first time using Dragon Bones, then you’d better follow that link. Since I’ll post more advanced tutorial here.
Well, not that advanced. Just some modification of the DB “Cyborg” example .fla file and how to implement it on CE.

Animation Setup
As I already stated above, We’ll use the DB Cyborg.fla file. Get it here: DB Sample.
The .fla file is a example how to setup character that using nested armature to create a character that can switch its weapon.
But with some modification. I set the animation label to be match with CE animation setup: idle, walk, jump, and duck. And I remove some unnecessary animation frames.
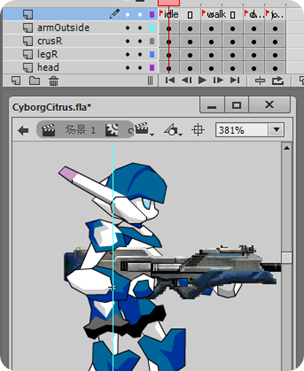
Citrus Engine Dragon Bones

Actually, if you know how to setup DB armature for CE, you can use this DB character for your hero. And if you take a look at Example_Cyborg_SwitchWeapon.as file, then you can implement a switching weapon feature by yourself. But for the sake of this article,  I’ll just write it here and add some minor additions: blinking eye & shooting animation.

Blinking Eye
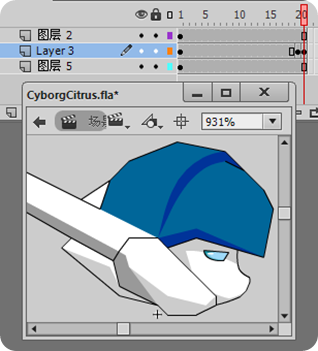
First thing first, open the Head movieclip until it show its timeline. You’ll see three layers, each contains helmet, face, and eye. Convert all these objects to MovieClip.
By converting all graphics to MovieClip then it will marked as Skeleton/Armature by Dragon Bones. So it have independent animation. In this case it's the blinking eye.
And then animate the eye. It just reducing the eye’s height, nothing more. Pretty simple.
Citrus Engine Dragon Bones Tutorial
the middle layer is the eye layer


Shooting Animations
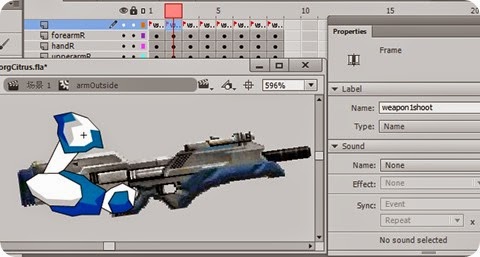
Open the armOutside movieclip. You can see each weapon are separated into frames. There are 4 weapons: assault rifle, sniper rifle, machine gun, and rocket launcher. Assault rifle at frame 1 with label weapon1, sniper rifle at frame 2 with label weapon2, etc.

Now add additional keyframe for each weapon frame. For example, for a frame  labeled with weapon1, create a new keyframe with weapon1shoot label. Then on the stage, simply move and rotate the arm and the gun to create a shooting effect. Do the same thing to other weapon frames.

And since DB also support animation blending,  no need to set up more complex and tween animation. DB will do the rest.
Citrus Engine Dragon Bones Tutorial

Do the same thing for armInside movieclip too.

Open the Dragon Bones extension panel. Then hit the ‘import’ button. Check the animation, adjust everything until you get the desired effect.
Also make sure that there are 4 skeletons: cyborg, armOutside, armInside, and Head.
Originally, this DB .fla example will only have 3 skeletons cyborg, armOutside, and armInside, but we've convert the head's graphics into MovieClip, and add the blinking animation, so now you can see, it become a DB skeleton.

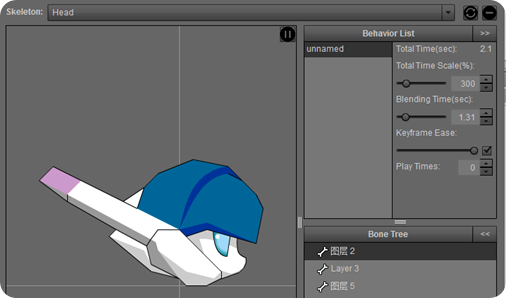
Open the Head skeleton. Set the Play Times to 0 to make it loop. So the eye will blink endlessly and continuously.
The other values are up to you to set the blinking speed & duration, but my settings are like this:
Citrus Engine Dragon Bones Tutorial

Make sure everything is set up properly. Then export it to PNG + XML file.
Extract the zip file.
And start coding.


To the Code
Create a Starling CE project on your IDE. Setup the Main and State class as well. I’m using Nape here, but that shouldn’t be a problem if you using Box2D.

I’ll post the complete code of the State class, and then the explanations is after that.

package  
{    
    import citrus.core.starling.StarlingState;    
    import citrus.objects.platformer.nape.Hero;    
    import citrus.objects.platformer.nape.Platform;    
    import citrus.physics.nape.Nape;    
    import citrus.view.starlingview.StarlingArt;    
    import dragonBones.Armature;    
    import dragonBones.Bone;    
    import dragonBones.events.AnimationEvent;    
    import dragonBones.factorys.StarlingFactory;    
    import dragonBones.objects.XMLDataParser;    
    import flash.events.TimerEvent;    
    import flash.geom.Point;    
    import flash.geom.Rectangle;    
    import flash.ui.Keyboard;    
    import flash.utils.Timer;    
    import starling.textures.Texture;    
    import starling.textures.TextureAtlas;    
  
    public class GameState extends StarlingState    
    {    
        [Embed(source="../assets/texture.png")]    
        private static const CYBORG_PNG:Class;    
        
        [Embed(source="../assets/texture.xml",mimeType="application/octet-stream")]    
        private static const CYBORG_TEX_DATA:Class;    
        
        [Embed(source="../assets/skeleton.xml",mimeType="application/octet-stream")]    
        private static const CYBORG_SKELETON:Class;    
        
        private var factory:StarlingFactory;    
        private var armature:Armature;    
        private var rightHand:Bone;    
        private var leftHand:Bone;    
        
        private var weaponID:int = 1;    
        
        private var canShoot:Boolean = true;    
        
        private var shootTimer:Timer;    
        
        public function GameState()    
        {    
            super();    
        }    
        
        override public function initialize():void    
        {    
            super.initialize();    
            
            StarlingArt.setLoopAnimations(["idle"]);    
            
            var nape:Nape = new Nape("nape");    
            nape.visible = true;    
            add(nape);    
            
            var floor:Platform = new Platform("floor", {width: 1400, height: 20});    
            floor.x = 700;    
            floor.y = stage.stageHeight;    
            add(floor);    
            
            for (var i:int = 1; i <= 2; i++)    
            {    
                var wall:Platform = new Platform("wall" + String(i), {width: 20, height: 400});    
                wall.y = 200;    
                
                if (i == 1)    
                {    
                    wall.x = 0;    
                }    
                else    
                {    
                    wall.x = 1400;    
                }    
                
                add(wall);    
            }    
            
            var atlas:TextureAtlas = new TextureAtlas(Texture.fromBitmap(new CYBORG_PNG()), XML(new CYBORG_TEX_DATA()));    
            
            factory = new StarlingFactory();    
            factory.addSkeletonData(XMLDataParser.parseSkeletonData(XML(new CYBORG_SKELETON())));    
            factory.addTextureAtlas(atlas, "CyborgCitrus");    
            
            armature = factory.buildArmature("cyborg");    
            
            rightHand = armature.getBone("armOutside");    
            leftHand = armature.getBone("armInside");    
            
            var hero:Hero = new Hero("hero", {registration: "topLeft", width: 70, height: 200});    
            hero.view = armature;    
            hero.x = 700;    
            hero.y = 100;    
            add(hero);    
            
            view.camera.setUp(hero, new Rectangle(0, 0, 1400, 400), new Point(.5, .5));    
            
            _ce.input.keyboard.addKeyAction("ChangeWeapon", Keyboard.A);    
            _ce.input.keyboard.addKeyAction("Shoot", Keyboard.S);    
            
            shootTimer = new Timer(300, 0);    
            shootTimer.addEventListener(TimerEvent.TIMER, shootHandler);    
        }    
        
        override public function update(timeDelta:Number):void    
        {    
            super.update(timeDelta);    
            
            if (_ce.input.isDoing("Shoot") && canShoot)    
            {    
                rightHand.childArmature.animation.gotoAndPlay("weapon" + weaponID + "shoot", .1);    
                leftHand.childArmature.animation.gotoAndPlay("weapon" + weaponID + "shoot", .1);    
                
                rightHand.childArmature.addEventListener(AnimationEvent.COMPLETE, animComplete, false, 0, true);    
                leftHand.childArmature.addEventListener(AnimationEvent.COMPLETE, animComplete, false, 0, true);    
                
                canShoot = false;    
                shootTimer.start();    
            }    
            
            if (_ce.input.justDid("ChangeWeapon"))    
            {    
                changeWeapon();    
            }    
        }    
        
        private function shootHandler(event:TimerEvent):void    
        {    
            canShoot = true;    
            
            shootTimer.stop();    
        }    
        
        private function changeWeapon():void    
        {    
            if (weaponID < 4)    
            {    
                weaponID++;    
            }    
            else    
            {    
                weaponID = 1;    
            }    
           
            rightHand.childArmature.animation.gotoAndPlay("weapon" + weaponID);    
            leftHand.childArmature.animation.gotoAndPlay("weapon" + weaponID);    
            
            switch (weaponID)    
            {    
                case 1:     
                    shootTimer.delay = 500;    
                    break;    
                
                case 2:     
                case 4:     
                    shootTimer.delay = 1000;    
                    break;    
                
                case 3:     
                    shootTimer.delay = 300;    
                    break;    
            }    
        }    
        
        private function animComplete(event:AnimationEvent):void    
        {    
            rightHand.childArmature.animation.gotoAndPlay("weapon" + weaponID, .1);    
            leftHand.childArmature.animation.gotoAndPlay("weapon" + weaponID, .1);    
            
            rightHand.childArmature.removeEventListener(AnimationEvent.COMPLETE, animComplete);    
            leftHand.childArmature.removeEventListener(AnimationEvent.COMPLETE, animComplete);    
        }    
    }    
}


Variables declaration
23-30: Embed the necessary DB files. _PNG & _TEX_DATA for creating the Texture Atlas, and _SKELETON for the DB animation.
32: factory variable to build the DB armature.
33. armature variable to store reference to the created armature
34-35: Variables to store reference to the left hand and right hand bones.

37: weaponID. Is information which weapon is currently active. From 1 to 4. Based on the both hands frame label: weapon1, weapon2, and so on.
39-41: Needed to create shooting behavior.

Initialize() Method
52: Add the ‘idle’ animation to become loop-able. Otherwise, it won’t loop.
58-78: Create the level. Well, just a floor and walls.
80: Create the Texture Atlas using the embedded image and XML.
82-84: Initialize the factory object. Add previously created Texture Atlas. Also the skeleton data.
86-89: Initialize the armature, leftHand, and rightHand object.

91-95: Create a Hero, and pass the armature object to its view property.
97: Set up camera to follow the hero

99-100: Add two new keyboard functions. Keyboard A button for switching weapon, and the S button for shooting.

102-103: Initialize the shoot timer.

Update() method
Override the update() method, and add the codes to check the pressed button.

112-114: If S button is pressed and the value for canFire variable is true, then for both of the hands, move to its shoot animation frames. If the current weapon is machine gun which is labeled as weapon1, then it will play weapon1shoot frame. And so on.
From the hand bones, access its childArmature, then access the animation property, and finally move to the target frame using gotoAndPlay() method.
Set the fadeInTime parameter to 0.1 so the animation blending is not too long.

115-116: Add Complete event for both hands. So if the shoot animation for weapon1shoot is completed, it will jump to weapon1 frame.
The event is defined on animComplete() method at line 166. And in this method the event listener for both hands also will be removed.

118-119: Set the canFire value to false and start the timer. If the timer is completed, it will fire the shootHandler() method that will reset the canFire value to true and stop the timer. So you can achieve a shooting delay, or a fire rate effect.

122: If the A button is pressed it will execute changeWeapon() method.

Switching Weapon
135-144: If changeWeapon() method is fired, then the first thing to do is to change the weaponID, in this case it just increase it.
If the value of weaponID is more than 4, then revert back to 1.

146-147: Then simply change the current frame to the next weapon frame, using that weaponID for sure.
The process is similar like how we change to shooting animation before.

149-163: Just some cosmetic. Change the shootTimer delay or fire rate according to the weapon type. Machine gun at 500 ms, sniper and rocket launcher at 1 second, etc.

Done
Compile and see the result.


Arrow keys to move the character, Spacebar to jump, A key to change weapon, and S key to shoot.

Alright, the tutorial is done.
Now you can achieve a nested animation and also weapon switching feature for your game, just like the old Flash movieclip, with gotoAndPlay and so on.
Well, not as straight forward than movieclip, but still, this is a great feature from Dragon Bones.

And finally, the source code.

Source Code
Download source here. It’s FlashDevelop project. CE & Nape .swc file included. As well as the .fla file contains the DB animation.
Download Source Code

TMX Tile Namer

Finally I managed to built a small AIR app to solve the naming problem for TiledMapEditor TMX file. Seems that I’m underestimating myself, or probably I'm just too lazy. XD

tileNamer
TMX Tile Namer… Yeah, it doesn't sound right… I’m not even sure that the term “Namer” is exist on English dictionary… XD

This is just one button app. To use, click on the button, and a browse window will appear. Then you can search for the tile atlas XML file. Open the file, wait for couple of second, then a new XML file will be created on your desktop.
Additionally, you can simply drag and drop the XML file to the button, and it will automatically generate an output XML file on your desktop.

There are some limitations in this app:
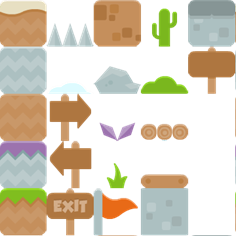
The app only work if the tiles have uniform size and make sure there are no empty tiles in the tileset. See below:

sprites

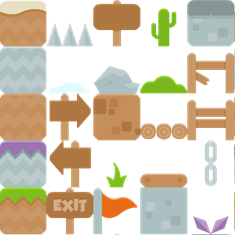
Something like tileset below won’t work as you can see, there are three empty tiles. Because TiledMapEditor will treat empty space/tile/region as a single tile, while on the atlas XML file, there are no information for that empty tiles.

sprites - Copy

To solve the problem, you can add new tiles or duplicate some of the existing tiles, so there are no empty tiles. Not a resource wise for sure. But that’s the only solution for now.

Another limitation is that the app won’t write the tile name directly to the TMX file. So, to complete the process, open this app’s output XML file, and copy all the <tile> node inside the root node <tiles>.

tileNamer2

Open the TMX file with your code editor, then paste them inside the <tileset> node

tileNamer3

Still a little bit complicated, but surely less headache than giving name to each tiles one by one via TiledMapEditor. XD

Probably in the future, I’ll improve the app. But for now, it’s enough for me.
If you want to improve the app, then here it is the app source code.
The code is messy & not commented. I’ve warn you… XD
It is a Flash CS6 project, but you can simply copy-paste or move the Main.as class to your new pure AS3 project. Flash CS6 is just used to build the interface, well, in this case it’s just a background and a button

The AIR app is inside the bin folder, named TMXTileNamer.air. Since it built with AIR 3.9, then you’ll need latest AIR runtime on your machine to install & run this app.

Well, here it is the new sample project on my previous article, but now with few more tiles added.

Citrus Engine + Tiled Map Editor: Starling Mode

Alright, just want to share my experience when using Tiled Map Editor on Citrus Engine with Starling. Nothing too fancy here. Almost all of the process is pretty much same with my previous article.

citrus-tiled

Hell yeah, there are some additional workaround if you working with CE Starling mode. The very first different task is the tileset creation. Unlike the display list version which you only need a .PNG file for the tileset, on Starling version, you’ll need an texture atlas (PNG + XML file). There are some tools to generate texture atlas: Flash Pro CS6 or above, Texture Packer and ShoeBox. Well, there are probably another tools, but maybe I’m too lazy to do a google search. Smile with tongue out

Flash Pro is very expensive of course, but if you have the license, you can use it to create the tiles and export it to an atlas. Texture Packer is also the paid one, although they also have the lite version which will leave a watermark on your tileset. So better use the third tool: ShoeBox. A free AIR application that have several functions for processing game arts: creating spritesheet, tileset, generating PNG sequence from animation, etc. More than enough for me.

shoebox

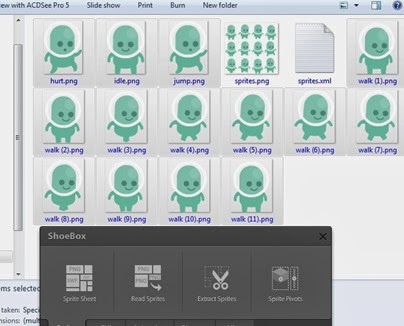
As I said before, the tileset creation is different. You’ll need to export a separate bitmap file for each of the tiles from your graphic editor software to be processed on ShoeBox.

Using the same tileset from Kenney, and I pick a few tiles:

Tile starling citrus engine


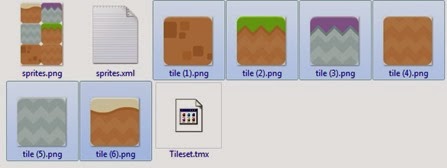
6 tiles, and the other files are the atlas (PNG + XML) and TiledMapEditor TMX.

Now, we can create an atlas from these tiles. Simply select all of the 6 tiles, drag and drop it to Shoebox’s Sprite Sheet feature. And a new window will popped up:

Tile starling citrus engine

Alright, the tricky part starts from here. We need to make some adjustment, so we can use this tileset properly, because of this issue. As you can read on that forum thread, there will be some kind of transparent lines between the adjacent tiles when the camera moving. It’s look like the tiles aren’t attached to each other correctly.

Starling tiled map citrus engine

You can found someone else already asked about this issue on Starling or Citrus Engine forum. And also, on the Starling wiki already mentioned about this. Well, all of them already pointing out a proven solution: Add some extrude to the tilemap. Extrude is simply expanding the edges of the tiles by specified pixel size. How this option can solve the problem? Well, let’s just continue this article.

Now click the Settings button.  Another window will appear.

starling tiled citrus engine

First things first, make sure you select Starling, Sparrow on the Template dropdown menu.
“Tex Extrude Size”, well, that’s we’re looking for. Let’s change the value to 1. Problem solved? Not yet.
With Tex Extrude Size 1 and Tex Padding 1, we’ll get these tileset:

starling tiled citrus engine

Extrude working correctly, it expand the edges by one pixel. And the padding as well, it separate each tiles by one pixel. But as you can see, the adjacent tiles shared the same expanded pixel. The most noticeable are between grey tiles and brown tiles. Their expanded pixel is filled with grey color only. It’s definitely wrong.

The solution is just simply increase Tex Padding value. Ideally, it’s 2 times larger than the extrude value. So if the extrude size is 1 then the padding should be 2, and so on.
This is what we’ll get if using extrude 1 & padding 2:

Starling tiled citrus engine

With 2 pixel spacing between tiles, each tiles have one pixel extra on its edges. Now this is correct.

Tile’s spacing problem fixed. But before hit the shinny blue Save button, take a screenshoot/print screen your Sprite Sheet window. Make sure the tile’s label is readable. Paste it to paint, or other image editing tools, and save it.
Don’t ask why, I’ll explain it later.

starling tiled map

Alright you can hit the save button. Two new files will be created, a .png file and .xml. The xml file holds each tiles information, such as its name, coordinate, etc. While the png file is the tiles merged into one image file.

Now open the TiledMapEditor, create a new map with 70x70 px tile size since our tiles is also 70 px sized. Create new tileset, and use the png file that already generated before.

starling tiled citrus engine

But for the tile width and height, we set it to 71 px instead of the actual size (70 px), because we already add one extra pixel for each tiles using the extrude option.

Also for the spacing, set it to 1. Don’t know why it’s not using the same value as Tex Padding value on Shoebox, which we set it to 2. But I also don’t know why it’s work for me. So if the created tileset is separated correctly on TiledMapEditor’s tileset panel, then it’s mean that you’re set the spacing correctly. lol

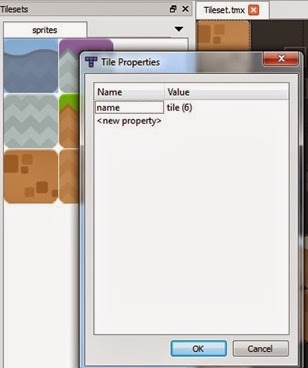
On the tileset panel, right click one of the available tile, then select ‘Tile Properties’. A window will appear. We’ll give a name property to each tiles in the TiledMapEditor according to the already created tileset.

Now, open the previously taken screenshot. Using that screenshot as guide, then insert the corresponding name to all tiles.

starling tiled map citrus

Dafuq?

Yep, you’ll need to insert the name one by one. Clearly a tedious process, especially for a larger tileset with lot of tiles. Not to mention that you’ll need to re-adding the name property if you make some changes on the tileset. XD

I’ve no other solution for now. But if you have some free times, then you can create a tiny AIR tools to read the SubTexture’s name property on the tileset’s XML file and then write it to the TMX file. Both of the files are based on XML, so I’m definitely sure it’s doable with AS3. But still beyond my knowledge. XD 
You can take a look at my app here: TMX Tile Namer

Alright, because we only have 6 tiles, so it should be done just in a few minutes. Now you can start drawing your map and adding citrus objects just like on my previous article.

starling tiled citrus

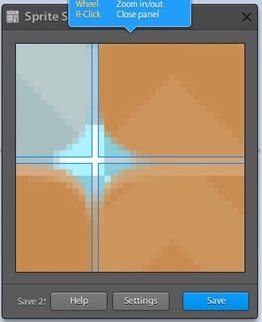
The picture above shows how the extrude work. As you can see there are extra pixel on the edge of the tile. With these extra pixel, then surely there will be no more problem with transparent lines between tiles as I mentioned before. Because now it closed by that extra pixel.

Done?
If yes, then open your Flash Develop, or your own preferred IDE. Set up a Starling Citrus Engine project. Then create a state for the game screen.
I won’t explain that here. So if you’re new to Citrus Engine, then you’d better to find some basic tutorial.

The first things to do is embed the atlas files (XML & PNG), also the TMX file.

[Embed(source="../assets/bitmap/tiles/Tileset.tmx",mimeType="application/octet-stream")]   
private const tileMap:Class;    
         
[Embed(source="../assets/bitmap/tiles/sprites.xml",mimeType="application/octet-stream")]    
private const tileMapXML:Class;    
        
[Embed(source="../assets/bitmap/tiles/sprites.png")]    
private const tileMapImage:Class;


On the initialize method, under the box2d object initialization, put the code to parse the tileset.

var mapAtlas:TextureAtlas = new TextureAtlas(Texture.fromBitmap(new tileMapImage()), XML(new tileMapXML()));     
ObjectMakerStarling.FromTiledMap(XML(new tileMap()), mapAtlas);


As you can see, we create a TextureAtlas object for the map before inserting it to the parser. Using the embedded PNG and XML file.
And since we’re working using Starling, so we using ObjectMakerStarling utility class. And then call the FromTiledMap() method. It accept three parameters. The first one is the the TMX file. Since it need to be an XML object, so we cast it to an XML.
The second one is the atlas. Simply insert the mapAtlas object we’ve already created before. And the third one isn’t necessary.

Don’t compile the game yet, as I’m sure it will throw lot of  errors. It because the tiles name on the XML and TMX isn’t same.

To correct this, we need to make some edits on the XML file. It just simply remove the extension on the SubTexture name property. You can remove it manually one by one, or using search & replace function on your IDE.

starling tiled citrus

Now compile the game, it should be running perfectly, and you’ll see your created level.

Game Objects?
Starting from the hero, using the character PNG sequence form the same art package as the tileset. Make sure it’s facing right direction. And give it CitrusEngine’s default animation name (idle, walk, jump, duck, hurt).

Using the Shoebox’s Sprite Sheet function to generate a Texture Atlas. Pretty much same as we generate the tileset. But for this one, we set the Tex Extrude Size and Tex Padding to 0, as we don’t need these options.

starling tiled citrus engine

After that, you can create a Hero object on the TiledMapEditor. Give it “hero” name, and set some properties if necessary. But unlike on the previous article, the view property need to set via code, not inside TiledMapEditor.

So, go back to the code editor. Embed the hero’s PNG & XML files on your code.
[Embed(source="../assets/bitmap/hero/sprites.png")]   
private const heroImage:Class;    
         
[Embed(source="../assets/bitmap/hero/sprites.xml",mimeType="application/octet-stream")]    
private const heroXML:Class;


Then on intialize() method:
var heroAtlas:TextureAtlas = new TextureAtlas(Texture.fromBitmap(new heroImage()), XML(new heroXML()));   
var heroSequence:AnimationSequence = new AnimationSequence(heroAtlas, ["walk", "idle", "jump", "hurt"], "idle");    
            
var hero:Hero = getObjectByName("hero") as Hero;    
hero.view = heroSequence;


What we do is create a TextureAtlas object using the embedded PNG and XML file. Then create AnimationSequence object using that TextureAtlas.

We will using the AnimationSequence as the hero’s view. So grab the reference to the hero via getObjectByName() method. Then simply assign the AnimationSequence to its view property.

Do the same for other animated objects, i.e: the enemies.

For non animated objects like crate and coin, no need to create an atlas, as we can use just the PNG file. So embed the PNG file on your code, then to specify a view for the crate object is just something like this:
for (i = 0; i < getObjectsByType(Crate).length; i++)   
{    
      Crate(getObjectsByType(Crate)[i]).view = new Image(Texture.fromBitmap(new crateImage()));    
}


Draw Calls
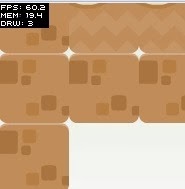
The game should be running perfectly without any problem. But if you see on the Starling stats monitor at the top left of the screen, you’ll see that it used more than 50 draw calls.

StarlingTiled12

What is draw calls? While I’m not pretty sure about that, from what I know it’ll really give some effect to your game performance. The more draw calls the more chance that the game performance will be dropped, especially if you’re working for a mobile game.

So let’s reduce it by merge our asset into one big texture atlas. Collect the previously created atlases or art into one single folder. Then using the same Shoebox’s Sprite Sheet function, we create another texture atlas.

starling tiled map citrus engine

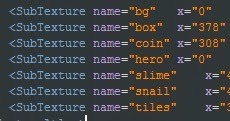
Open the created XML file on your code editor, the remove file extension on each SubTexture’s name property. We’ll use this name property to get specified texture from this merged atlas.

StarlingTiled14

Now, instead embedding different PNG files for different objects, we can just embed this previously created PNG file. So the embedding codes in the game state class should be look like this:
private var textureAtlas:TextureAtlas;   
        
[Embed(source="../assets/bitmap/atlas/sprites.png")]    
private var atlasImage:Class;    
        
[Embed(source="../assets/bitmap/atlas/sprites.xml",mimeType="application/octet-stream")]    
private var atlasXML:Class;    
        
[Embed(source="../assets/bitmap/tiles/Tileset.tmx",mimeType="application/octet-stream")]    
private const tileMap:Class;    
         
[Embed(source="../assets/bitmap/tiles/sprites.xml",mimeType="application/octet-stream")]    
private const tileMapXML:Class;    
        
[Embed(source="../assets/bitmap/hero/sprites.xml",mimeType="application/octet-stream")]    
private const heroXML:Class;    
        
[Embed(source="../assets/bitmap/enemy/slime/sprites.xml",mimeType="application/octet-stream")]    
private const slimeXML:Class;    
        
[Embed(source="../assets/bitmap/enemy/snail/sprites.xml",mimeType="application/octet-stream")]    
private const snailXML:Class;


We just embed one merged PNG file. No more embedding each different object’s PNG file.

So, to use it we need to create a TextureAtlas object.
textureAtlas = new TextureAtlas(Texture.fromBitmap(new atlasImage()), XML(new atlasXML()));

If this object already created, we can simply call the getTexture() function to gather the specified object’s atlas or image.
For the hero, now we do something like this to create the atlas:
var heroAtlas:TextureAtlas = new TextureAtlas(textureAtlas.getTexture("hero"), XML(new heroXML()));


And for non animated object as well:
Crate(getObjectsByType(Crate)[i]).view = new Image(textureAtlas.getTexture("box"));


Simply call getTexture() function from textureAtlas object, and insert specified name to its parameter.

Compile and run the game to see the difference…

StarlingTiled15

Yep, now it’s only have three draw calls. That’s a huge difference.

The End
Well, this is the end of the article
You can test the finished game, as well as the source code.

download

Shameless Promotions
Just in case you need some tilesets, game characters, and/or game interfacesNyah-Nyah

royalty free game tile set

royalty free game sprite sheet

royalty free game interface

Or go here to view the complete items.


Btw, why the heck the colors on some of the image on this article became washed out?

Shotgun vs Zombies: A Post Mortem

It’s been a long time since I wrote my last article here, so it would be better to keep the blog running by writing some new articles.
And, hell yeah, first post for 2013!!!

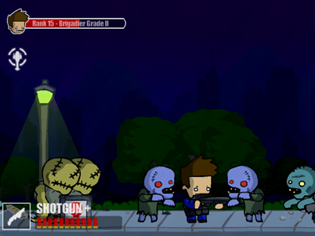
No tutorial this time. I just wanna share some numbers from my latest game: Shotgun vs Zombies.

shotgun vs zombies

Actually, I’d like to write a post mortem for the previous game: Stack of Defence. But since Playtomic service is completely down, I lost my stats. Not only for that game, but all my games that using their services. :\

Alright enough rants about Playtomic, let’s start the story here…
But, first things first, again and again, my enggrish is rly sux, so please don’t complaint about that…

Inspiration
If you’ve already play the game, you’ll find many similarities with many games from other developers. the gameplay is inspired from titles like Zombocalypse, Stop GMO, Tequila Zombies, and also other titles with similar gameplay. There are plenty games with zombie theme and with that kind of gameplay.
zombocalypse-12294stop-gmo-guns
tequila

I also heavily inspired by Discount Mayonnaise for its violent, grind based, fast paced, & hardcore gameplay. That’s pretty cool game!!
discount

Almost forget, Borderlands 2:
borderlands
Salvador Rulz!!!!

In conclusion, I want to create a mindless and hardcore survival game with lot of zombies to kill, upgradeable gun, explosion, blood, and gore, but with simple gameplay and controls...
Nothing too fancy about the gameplay mechanics, just clones of clones of clones of clones from above titles…LOL

Execution
Lot of inspiration here, I need to make my game standout (or at least, different) from the titles above.
What if there is only one weapon but can be upgraded become the destructive one. A shotgun seems pretty cool…
And what if it can installed with some mods like grenade launcher, rocket launcher, bayonet, ice bullet, etc. So we can shoot all of them with pulling only one trigger!?!?

Then I create this shotgun:
Gun

I ‘ve got the ultimately-badass but absurd shotgun, how about the characters?
Well, the main character itself have no background story behind him. I simply putting everything that make him good looking. XD
head

The same thing goes to the zombies. Just create a base zombie, give him some armor & weapon, then you’ll get 11 different zombie types. Kinda lazy, but can save the development times so much… XD
zombie

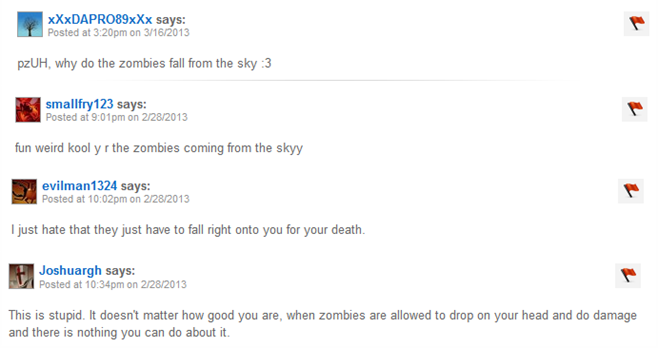
The other thing that make the game different from the others is that the zombies falling from the skies instead of crawling from the underground.
Sounds absurd? Absolutely yes. But seems that the players really love it:
comment
It’s actually just a product from my laziness to create crawling animation. XD
Talking about the game code, I’m using CitrusEngine for this game. I dunno why, but seems that I’m heavily addicted with this game engine. I also use it for several games so far. Big thanks to its contributor…
Faced no problem with the game coding process. So what else to write here?

In the end, the game completed for about 1,5 months. Not an effective time as I easily distracted to another things when developing that game: browsing, playing Borderlands 2, and so on… XD
Actually, it’s exceed my own deadline. In the last week of January, even the levels is not yet designed. Boss hasn’t created. LOL
So, some additional features for the game are canceled: achievements, alternative game modes, etc. I think it wouldn’t hurt the game so much.

Bidding
I’m sure $$$ always be the most interesting part… XD
I put the game on FGL on February. Gathering some developer feedbacks, first impression, and also  FGL pre-review service for about one week. Fixing bugs, balancing and updating the game till I feel the game is ready for bidding stage.
After another 2 days for FGL review process, the game got Editor Rating 8, which also mean meet my own target for the FGL Rating.

Okay, the game currently on bidding stage, what happens? Better see the charts:

The chart above shows the bidding process starting from 6 to 12 February. The bids started from $750 and ended to $3050. Not bad.
I also posted the game at TalkArcades, hoping that there will be some good bids. But after received some bids from TalkArcades members, seems that they only able to bids no more than 2k.
Spamming many sponsor inbox didn’t work as well. I got not even a single reply after sending 50++ emails to them…

The bids stuck at 3k after a week. And there are no new bid after that. 3k is acceptable for me, but better find out what will happen if I hit the Last Call button:

As you can see, I got even more bids. Although the bids value seems to be move up gradually, but it’s far better than before I activate Last Call mode.
I need to extend the bidding for another 24 hours since there is a new bid just a few seconds before the Last Call ended, and I still got new bids after that. Finally, I pick the last and highest bid $8150 from ArmorGames as winning bid.

In total, I got 30 bids after putting the game on bidding stage for about 3 weeks. Maybe I can get higher bid if I wait longer. But I always have not enough patience to wait more than 1 months. XD

Release
The guys at ArmorGames are really crazy. They want to release the game on their site just three days after I received their first mail!!!


But no real problem here. Their branding and API are pretty straight forward to implement. And the communication is pretty good.
So finally, the game can be released on their specified day: 28 February 2013.  And you know what, I also already received the payment on that day too…
No wonder if they’re one of the best flash game portals alongside a big name like Kongregate, Miniclip, etc…

During the exclusivity period on ArmorGames, my game got a mixed response from the people. Some of them said that the game is near impossible, while the other said that the game is addicting and challenging.
So far the game got for about 500k gameplays and 1,8k faves. Not sure if it good achievements or not. But what I know is that it far below if compared to other big titles like Raze, Kingdom Rush, Epic Battle Fantasy, etc… LOL

The game goes viral on 20 March 2013. Using Mochi leaderboard to handle the highscore, so I can use its basic analytics service (gameplay, duration, hosts,etc). Yeah Playtomic ruins everything… XD

Seems that the game only got decent response from the players on many portal sites. The only noticeable achievements are: featured on MochiGames & 3rd Place for Kongregate Weekly Contest.
But on Newgrounds, it got not even a P-Bot Daily Picks nor Featured on frontpage, although the game got a pretty good ratings. I’m kinda disappointed with this one.

I got the same mixed feedback from those sites, just like on the ArmorGames one. One said the game is too hard, but the other one likes it.
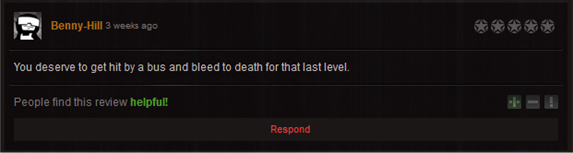
But my favorite comment is this:
comment2
LOL

Stats Breakdown
The game stats is not pretty spectacular:
Stats

Total 1 million plays until now. Adding stats from ArmorGames, then it will become 1,5 million gameplays.
Currently 10-20k average plays today.
Peak at 120k plays.
300 sites host the game
Average 15 minutes session lengths.
Top 5 countries: Brazil, US, Mexico, Spain, & Argentina

Wut?? no chinese sites, rly???
Yep, the game analytics only shows relatively small number of plays from china mainland. That’s because most of them hack the sitelock code and publish the game when it currently on exclusivity period on ArmorGames.
I know that because my blog got massive amounts of traffics from several chinese game portals during that period: 7k7k, 4399, etc. They’re pretty well known among the flash game developers.
So that’s the reason why plays from chinese portals not tracked by Mochis. They hosted the earlier game version which not use Mochi leaderboard.
Maybe chinese people can increase the total number of plays by 1, 5, or 10 millions. Who knows… XD
Not a big problem for me since no ads on the game. But surely a big problem for my sponsor. I feel sorry bout that…

As I said before, nothing too spectacular about the game statistics. But still a quite good achievement for me personally. It’s my first game that can reach 1 millions play in one month.

Gross Earning
So, let’s calculate how much I earn for this game so far:

Primary Sponsorship: $8150
Non-Exclusive Sponsorship: $1100
Mochi: $21
Kongregate Weekly Contest Prize: $150
TOTAL: $9429


Small Mochiads revenue because the ads implemented few weeks after the game goes viral.
In the agreement between me and ArmorGames, there are no clause about enabling ads for the game. But since the Mochi staff asked to enable it, in exchange they will feature the game on their site, everyone seems to be happy about that deal.

What Went Right
1. Addictive gameplay
Well, it could be just my own opinion based on players feedback & numbers of players completed the game. XD

2. Don’t ask why the zombies coming from the sky
It not intended to be a joke. But it seems really work well…
While the other jokes in this game are dry and lame. XD

3. Annoying boss
Tedious game must be ended with annoying boss… boss
No one loves this cute guy… XD

What Went Wrong
1. Game balance
2. Game balance
3. Game balance
I must admit, this game balance is the most problematic thing in this game. Tedious gameplay, too much ‘luck’ factor than skills, shotgun stats aren’t well-distributed, & enemy scaling is messy.

I just want the zombies getting stronger when the player getting stronger, just like on Elder Scroll or Borderlands series. But seems that I wrongly implemented it. So instead making the game challenging for most players, it just make the game frustrating one and need too long grinds to complete.
The increase of difficulty level for the zombies is just to harsh. At some levels, when the zombie already leveled up, you will stuck and need to grind on that level for 10++ times.

The shotgun itself isn’t less problematic. Some parts are overpowered: bayonet. Simply upgrade this to its maximum power, and you’ll beat the game easily.
Hey, it is Shotgun vs Zombies, not Bayonet vs Zombies…

There are more flaws about this game, but this article is too long already. So better end this right now… XD

What Next?

Yeah, keep the working formula, fix all the spotted flaws, add some new features, new enemies, new abilities, etc. And you’ll get a new game… Hopefully the more badass one… XD
But I have no plan to create a sequel for this game. I need to complete my studies first…

Thanks for reading anyway and have a good day…